ONLINE & MOBILE Banking

Online Banking

Online banking allows you to check your account balance, transfer funds, and see which payments and deposits have cleared, etc. It is also the portal for Bill Pay and Online Statements. To complete initial enrollment, follow the instructions provided to you by the Financial Representative that opened your account. For personal accounts, you may also opt to self-register by selecting the “Sign Up” link from the online banking login screen cfbindiana.myebanking.net/, then follow the prompts on the following screens. You will be asked a series of verification questions to confirm your identity.

How to Enroll:
  1. In your e-mail inbox, open message from [email protected] and click on link within email. If you were provided a security code by a Financial Representative, you will be asked to verify this before the next step. *You must set up your account within 72 hours or the link becomes inactive (If past the 72 hour timeframe, please contact the bank for resubmission of the invitation)
  1. Set up username, create a password, and set up 3 security questions/answers
  2. You’re in!
 
How to log in:
  1. Visit our website: cfbindiana.com
  2. In the upper right-hand corner you will find our “Online Banking Center.”
  3. Input username and select login
  4. Fill in boxes requesting information
 
If you forget your password:

Enter your USERNAME, click on “Forgot Password” and follow the steps provided

Mobile Deposit

Depositing checks can be as easy at 1, 2, 3! To enroll in Mobile Deposit, simply log into your mobile app, select Deposit Checks from the Menu and then the Mobile Deposit Agreement will display for you to review and accept the terms. Upon acceptance of the agreement, you can start depositing checks immediately and proceed with the following steps:

  1. Sign into our Mobile Banking App
  2. Select “Menu Bars” in the bottom left-hand corner
  3. Select “Deposit Checks”

*Please note that the if logging in on browser, the deposit checks option will only display previous mobile deposit history and will not allow you to complete deposit.

  1. On the back of the check endorse with signature and “FOR MOBILE DEPOSIT ONLY”

*Checks that are not endorsed properly will be rejected

  1. Capture front and back image of item
  2. Specify amount and account you wish to deposit your check into
  3. Click review and then submit

Move Money (Bill Pay, Internal Account Transfers, and Person to Person Payments)

In the Move Money tab, you are able to do three key items: Bill Pay, Internal Account Transfers, and Person to Person (P2P) Payments. With Bill Pay, you can manage your payments to various companies – all in one place (pay bills, review payment history and pending bill payments, as well as receive electronic bills through the internet). You can also set up an individual payee (Person to Person Payments) or transfer money within your internal accounts. 

How to sign up for Bill Pay and P2P Payments:
  1. Log into online banking.
  2. Click on the “Move Money” tab from the Menu option.
  3. Select the “Enroll in Bill Pay” option and follow the steps to complete enrollment before you will be able to submit external transfers. You may need to log out and log back in after completing enrollment before you will have the option to set up payees.
  4. Follow the steps to establish payees. To add a new payee, click on the plus sign under the “My Payees” area. There, you will be able to select whether the new payee is a company or individual. 


How to complete Internal Account Transfers:
  1. Log into online banking.
  2. Click on the “Move Money” tab from the Menu option.
  3. Select the “New Transaction” option (it will be a green button).
  4. Select which account to move money from & then select which account will be the recipient of the funds.
  5. Complete the form to enter the transfer amount, date of transfer, occurrence frequency, and note for reason of transfer. Then select “Continue”.
  6. Review information for accuracy & select “Submit”.

*Please note that internal account transfers made after 6 PM EST will be considered next day.

Managing Cards in Online Banking

You can view and manage your debit card(s) 24/7 through online banking. You have the ability to change the display name of your card, report card lost/stolen, update travel information, temporarily turn your card on/off, and enable automatic on/off schedules.

Instructions for Managing Cards in Online Banking

Sub-User Management

  1. Select Manage Profile from the upper left corner or if on the mobile app, select Profile in the lower right corner of the app
  2. Choose the plus sign (+) on the right to create a new sub-user or to edit an existing sub-user
  3. Fill in the new user’s name, display name, and email address. You will need to choose an invite answer and provide this to the new sub-user you’re adding
  4. Choose + Grant Access to Account and select the accounts you would like the sub-user to view (Once you have created the sub-user, you will be able to view/edit additional sub-user permissions)
  5. After selecting Create Sub-user, the sub-user you just added will receive an email with a link to finish setting up their sub-user profile. They will be asked to confirm the invite answer you typed in, then will be able to set up their own user credentials

Online Statements

Online statements allow you to receive and view your monthly bank statements through online banking and your mobile app. Online statement users will receive an e-mail notice every month notifying you that the statements are available in online and mobile banking. For your convenience, statements are stored for 18 months. 

To sign up:
  1. Log into online banking
  2. Under ‘My Accounts” click on the account for which you want to enable online statements. You may also click “Documents” on the left to select multiple accounts to enroll in online statements.
  3. Click on the “Statements” tab in the lower right-hand side of the screen – this should bring up a terms acceptance window for you to review
  4. After reviewing the electronic statement terms, scroll to the bottom of the window and click “View test document” then select the account(s) you’re requesting to receive online statements and click “Accept Terms” to complete the e-statement enrollment process

*Viewing the test document is required before accepting terms to ensure your device is capable of downloading and viewing statement PDF files.

*Previous mailed statements prior to the electronic statement terms acceptance will not be viewable online.

Mobile App

Enjoy Lots of Features
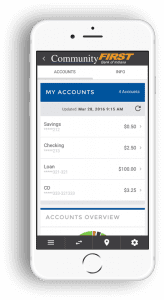
  • View all of your accounts
    • Move Money
    • Transfer Funds
    • Pay bills
    • Send money to friends and family with our P2P Payment Option
  • Deposit Checks
  • Manage Your Debit Card
  • Find our locations and ATMs
  • Set up and manage account alerts
mobile banking app

How To Get It

Search “Community First Bank of IN” in your Google Play Store or the Apple App Store and download for free.

Log-In

Use your online banking username and password to sign in.

You’ll also have the option to do a thumbprint save or facial recognition if your mobile device offers it.

Mobile Wallet

Your Mobile Wallet is at your fingertips! Save your debit card to your Mobile Wallet and enjoy safe, secure transactions without the hassle!

Community First Bank of Indiana does not charge a fee for Mobile
Banking. Third party message and data rates may apply. Check with your wireless carrier for details.
Mobile Deposit User Agreement and Disclosures required prior to use.

  • Online Banking
  • Mobile Deposit
  • Move Money
  • Manage Cards
  • Add Sub-User
  • Online Statements
  • Mobile App